
10 Best DIY Halloween Decorations
October 7, 2014
1). Glowing ghosts (inspired by marthastewart.com)
Materials:
- glow sticks
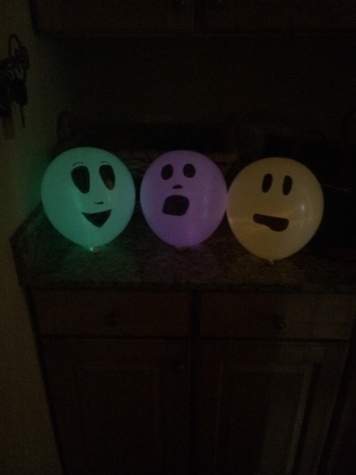
- white balloons
- black Sharpie
1- Snap each glowstick and place one glowstick in each balloon.
2- Inflate each balloon and tie the ends.
3- Use a black Sharpie to draw ghost faces and enjoy!
2). Stenciled pumpkins (inspired by flickr.com
Materials:
- stencils
- black, silver, white, or orange paint
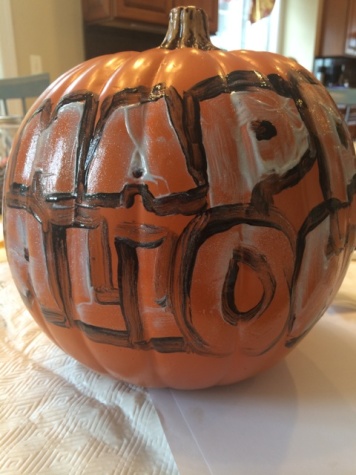
- paint brush
- pumpkin
1- You may first paint your pumpkin, however this is optional and you may use stencils on a plain pumpkin.
2- Use your stencil and fill it in using paint and a paintbrush
3- Continue filling in your stencil all the way around the pumpkin, and voila!
3). Halloween wreath (inspired by womansday.com)
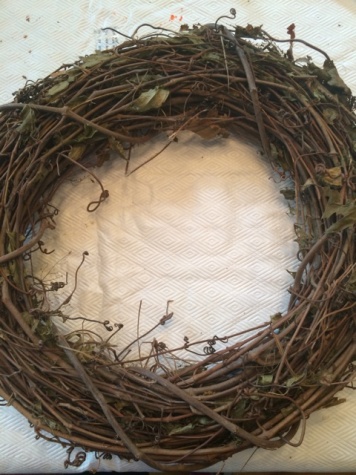 Materials:
15″–17″ grapevine wreath
- Dry twigs
- Decorations (Wired candy corn, spiders, fans of orange
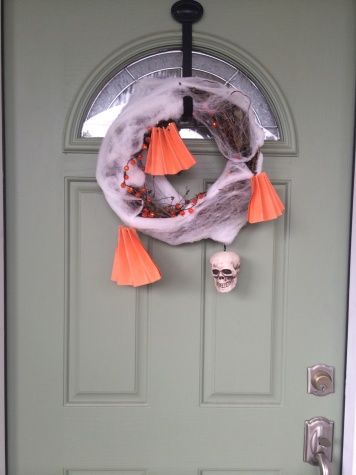 craft paper, etc.)
 - Spool of fishing line
- Artificial web
- Small skeleton
1- Place twigs in a vine wreath.
2- Tie on candy decorations desired with fishing line (I used light-up pumpkins and fans of craft paper!)
3- Drape web over the wreath.
4- Tie on skeleton at the bottom with fishing wire and hang up the wreath!
4). House-o-lantern (inspired by family.disney.com)
Materials: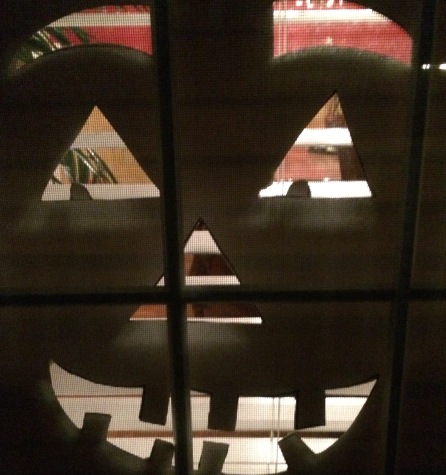
- cardboard
- exacto knife
- scissors
- pencil
1- Cut your cardboard with scissors so that it fits in the window.
2- Draw a jack-o-lantern face on the cardboard.
3- Use an exacto knife to cut out the face.
4- Place the cardboard in a window and turn the lights on!
5). Halloween tin cans (inspired by jollymom.com)
Materials:
- black Sharpie
- empty tin cans
- black paint
- paint brush
- candles
- hammer and a large nail
- towel
- water
- toothpicks
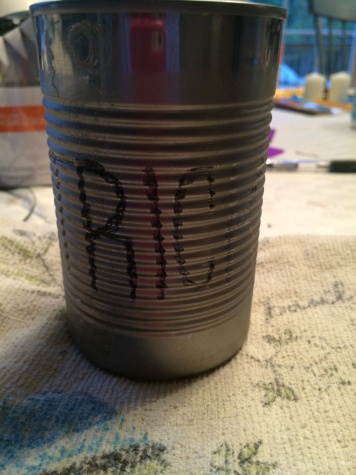 1- Fill the tin can with water and place it in the freezer. When the water in the can is frozen, remove the can from the freezer.
2- Draw in a word or design of your choice on the tin can using a black Sharpie
3- Place the tin can on a folded towel to reduce the impact for the next step.
4- Use a hammer and nail to puncture the design into the tin can (lay the can on its side 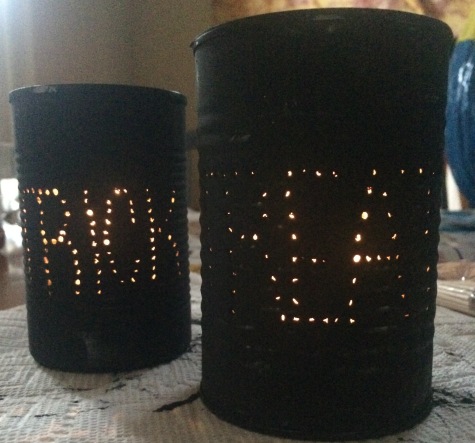 for this part!)
5- Run the can under hot water to melt the ice (hammer down the bottom of the can if it isn’t level).
6- Paint the can with black paint and a paint brush (you may have to poke through some holes with a toothpick if the paint clogged them up)
7- Place a candle inside the can and make as many more as desired!
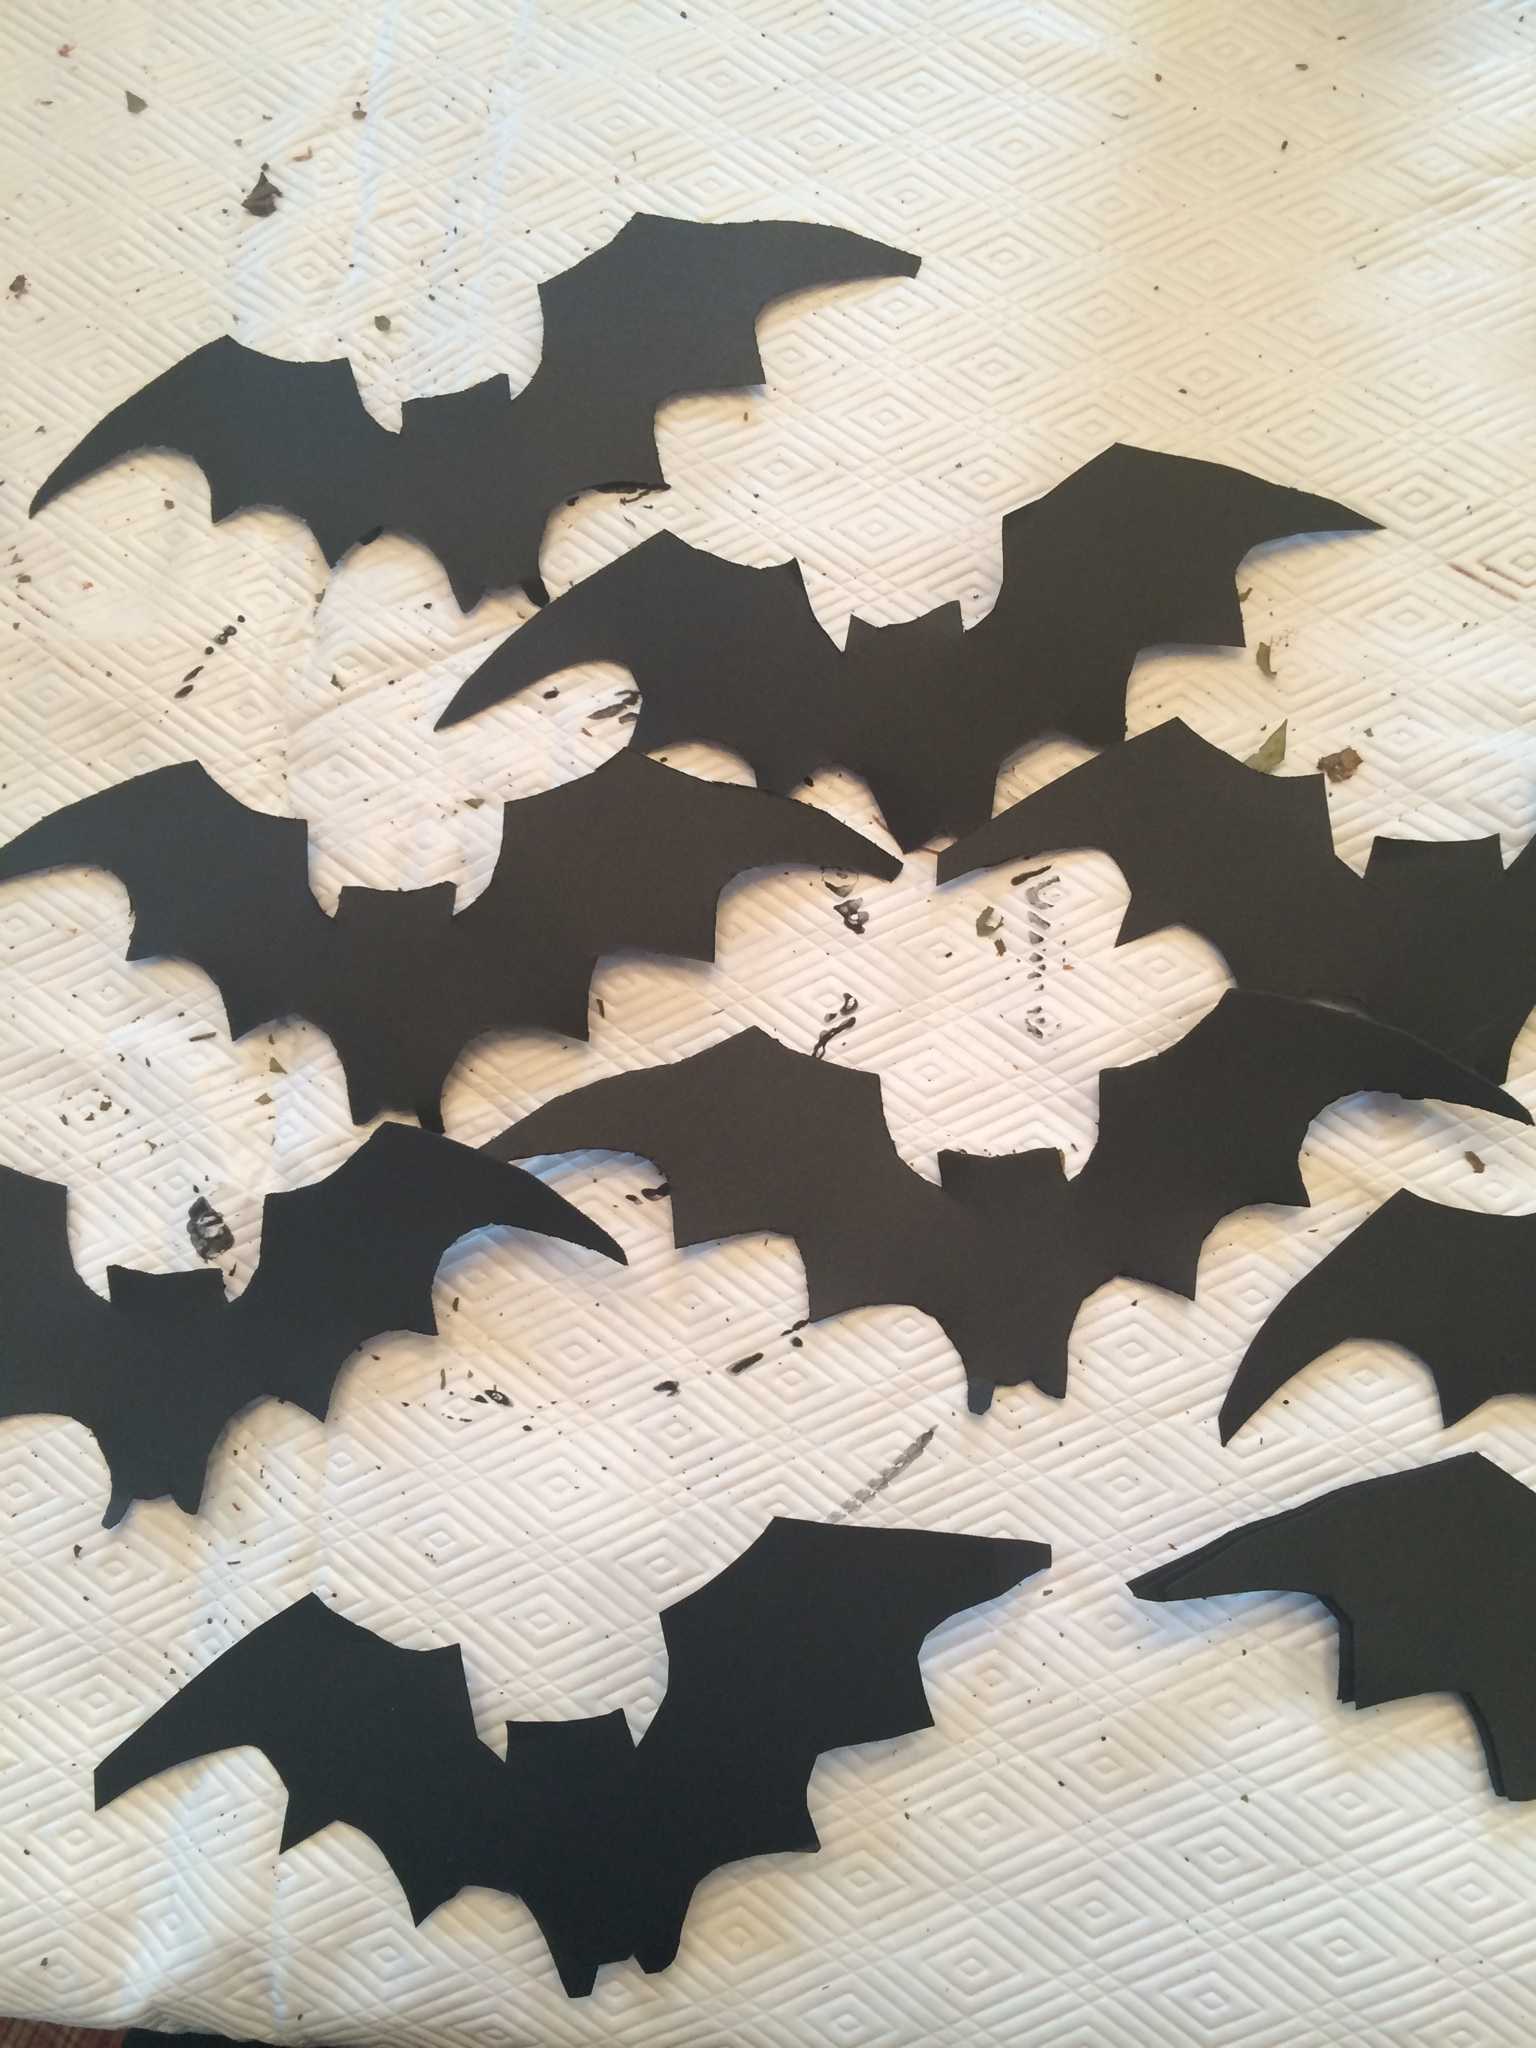
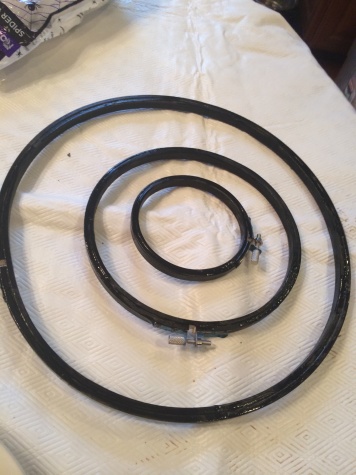 6).Bat chandelier (inspired by jollymom.com)
Materials:
- black card stock
- black craft paint
- paintbrush
- scissors

- embroidery hoops in three sizes
- black tape
- black quilting thread
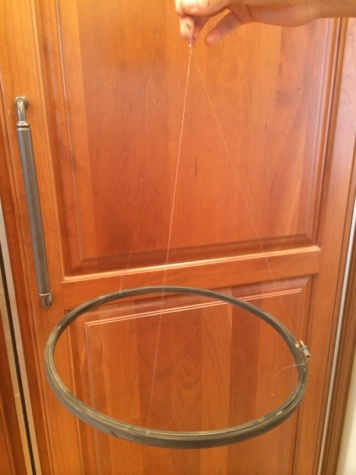 1- Paint all three embroidery hoops black.
2- Cut out black bat shapes (you can use a bat template online).
3- Once the hoops are dry, take the largest hoop and 3 lengths of thread. Tie 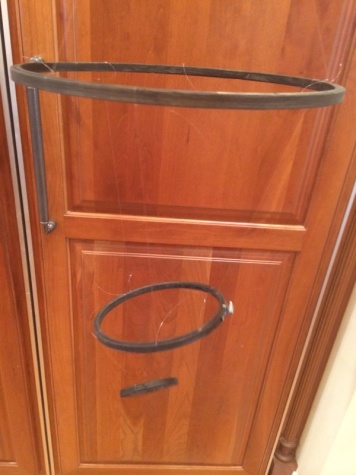 each thread securely around the hoop (trying to keep them equal distance apart) and then bring all three threads together in the center and tie
 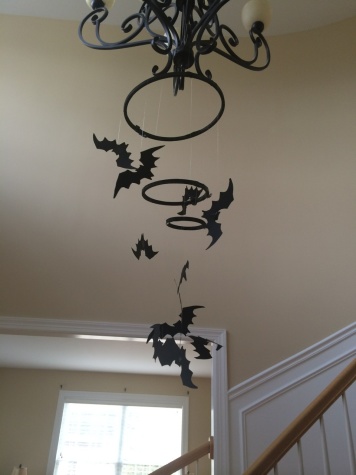 them into a knot.
4- For the next two hoops, tie three threads to each and tie them to the hoop above.
5- Attach each bat to a piece of thread using tape and attach each piece of thread to a hoop using tape. (The chandelier looks best when the bats are hung in random spots)
7). Minion pumpkins (inspired by craftberrybush.com)
Materials:
- pumpkin
- canning jar lids
- long screws
- wooden skewer
- hot glue
- Yellow outdoor paint or spray paint
- Blue outdoor paint or spray paint
- White paint, black and brown paint or Sharpie
- Black pipe cleaners
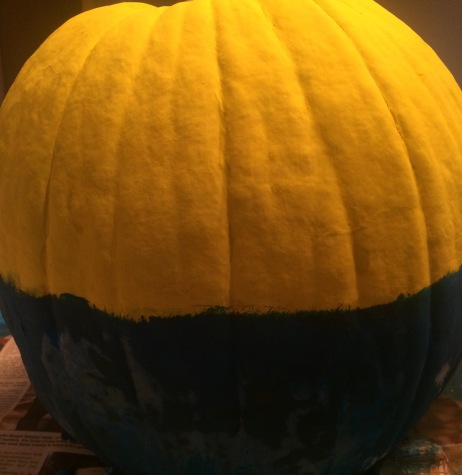 Paint top half pumpkin with yellow paint and let dry.
- Paint bottom of pumpkin with blue paint and let dry.
- Once dry, repeat step 1 and 2 (adding a second coat).
- Take a canning jar lid and pierce a hole in the center.
- Invert the lid so the white part is showing and insert screw through the center.
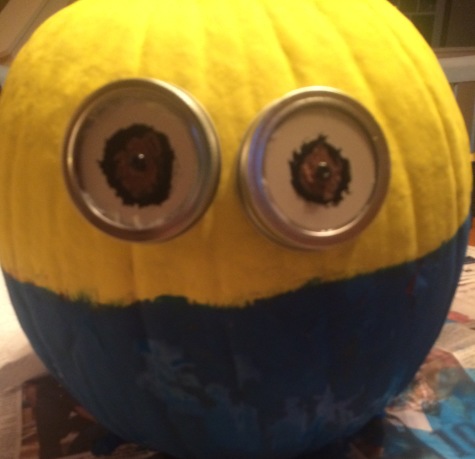
- Apply hot glue all around silver ring and hot glue lid to it; set aside
- Repeat steps 4-6 for a second eye.
- Puncture holes in the pumpkin where the eyes are desired.
- Gently push screws and lids into hole.
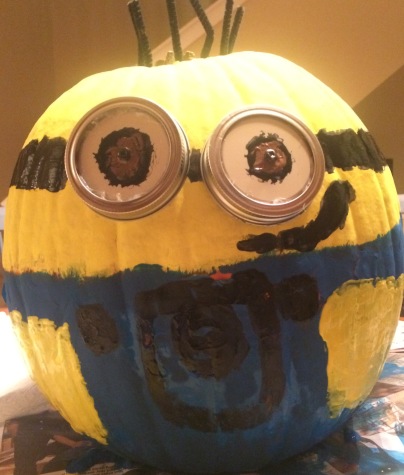 Paint the black straps of the goggles at either side.
- With paint or Sharpies, color in the details of the eyes; the screws will be camouflaged by the black paint.
- For the hair, use the skewer to pierce holes at the top of the head and insert the pipe cleaners.
- Add additional details, such as the mouth and overalls. Enjoy and make as many minions as desired!
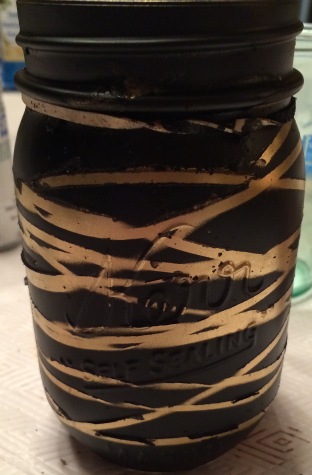
8). Mason jar mummies (inspired by itallstartedwithpaint.com)
Materials:
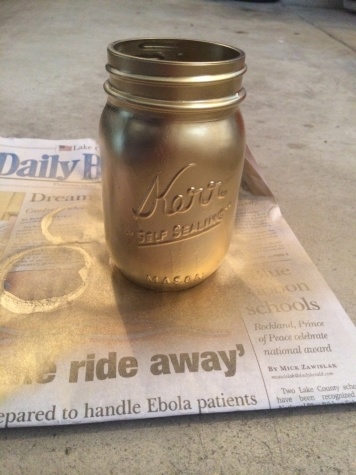 mason jar
- gold spray paint
- rubber bands
- black spray paint
- sponge brush
- paint brush
- gold paint
- white paint
- black paint
- Coat your jar with
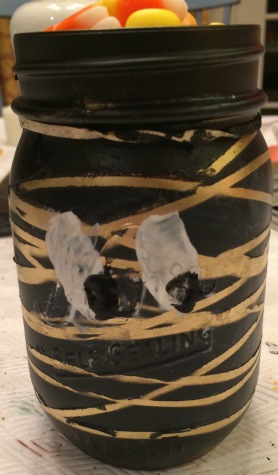 gold spray paint and let dry.
 - Wrap it with rubber bands and spray paint it black. Let dry.
- Take the rubber bands off and re-touch the gold paint with a brush.
- Use a sponge brush dipped in white paint to make the whites of the eyes. Let dry.
- Use a paint brush dipped in black paint to make the irises.
- Fill with candy and enjoy!
9). Light-up halloween mason jars (inspired by pluckys-secondthought.com)
 Materials:
- 4 mason jars
- orange, green, purple, white and black tissue paper
- black cardstock
- mod podge
- scissors
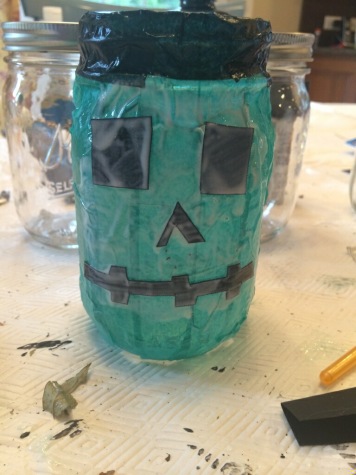
- white Christmas lights (100 bulb strand)
- paint brush
1.Cut the tissue paper into strips (the height being based on the height of the Mason jar)
- Paint mod podge on the outside of the jars and lay down the strips of paper
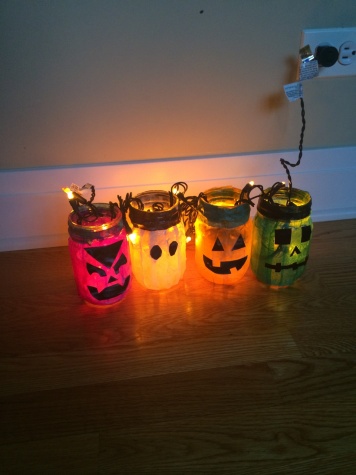 vertically around the jar. Paint mod podge on the tissue paper, being careful not to rip it.
 - Place one strip horizontally around the rims of the jars.
- Cut out faces with black cardstock and stick them to the jars with mod podge. Paint mod podge over the cardstock.
- Let the jars dry and place Christmas lights inside!
10). Book page pumpkins(inspired by eclecticallyvintage.com)
 Materials:
- a piece of paper
- an old book
- scissors/ exacto knife
- hot glue
- orange spray paint
- stick
- ribbon (optional)
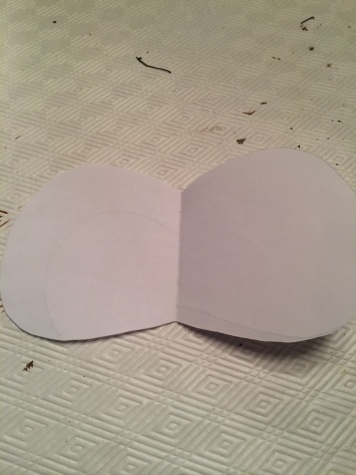
1- Fold a piece of paper in half and cut it out into a pumpkin shape so that the halves will be symmetrical.
2- Take the cover off of your book and place the pumpkin pattern on the fold on the binding edge. Trace around the pattern with a pencil
3- Use scissors to cut out the pattern all the way to the edge of the binding. It’s easiest to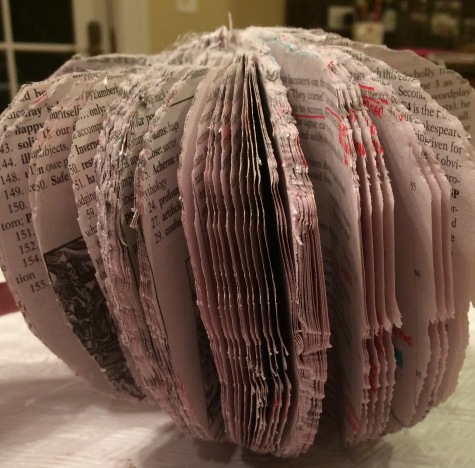 cut 5-6 pages at a time.
4- Tear off the excess of the pages so that only the pumpkin shape remains. Continue shaping and cutting until there are no pages left.
5- Place a strip of hot glue on the edge of a page and 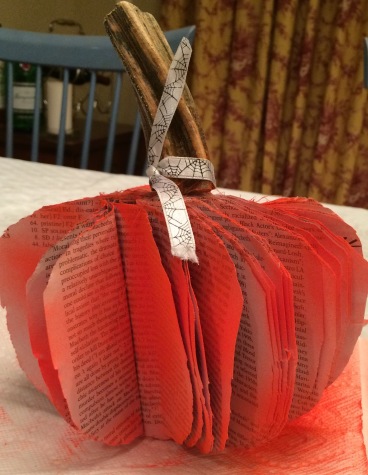 attach the next page to it. Continue this process all the way around so that the pumpkin is spherical.
6- Add a light spritz of orange spray paint to the pages.
7- Grab a small stick from your backyard (or I used an actual pumpkin stem) and hot glue it to the top of your book. You may tie a ribbon around the stick if you wish.